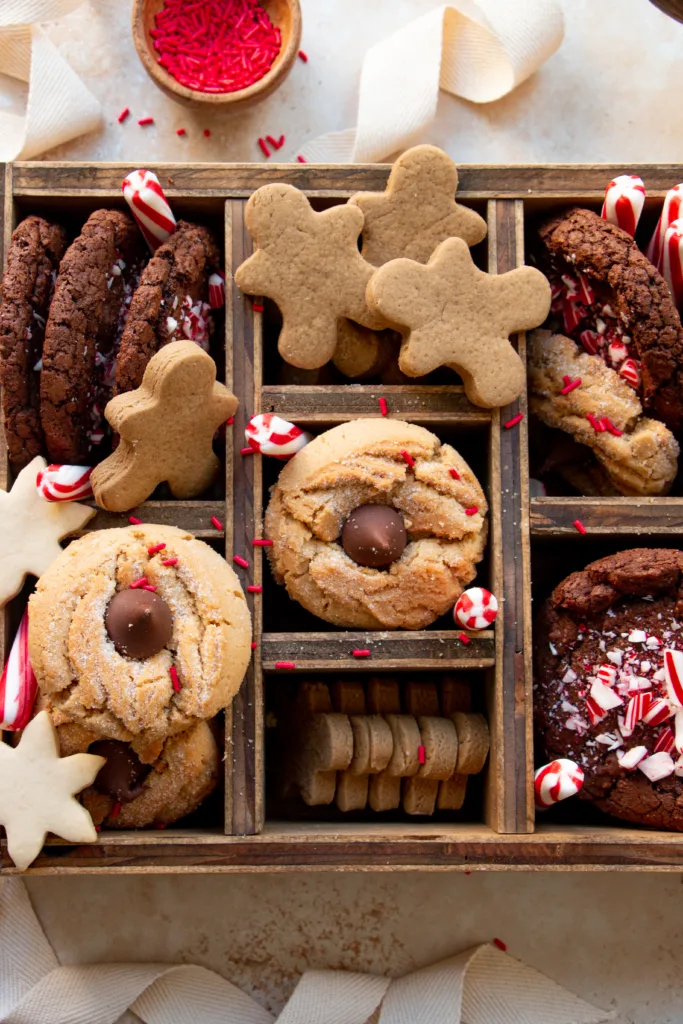
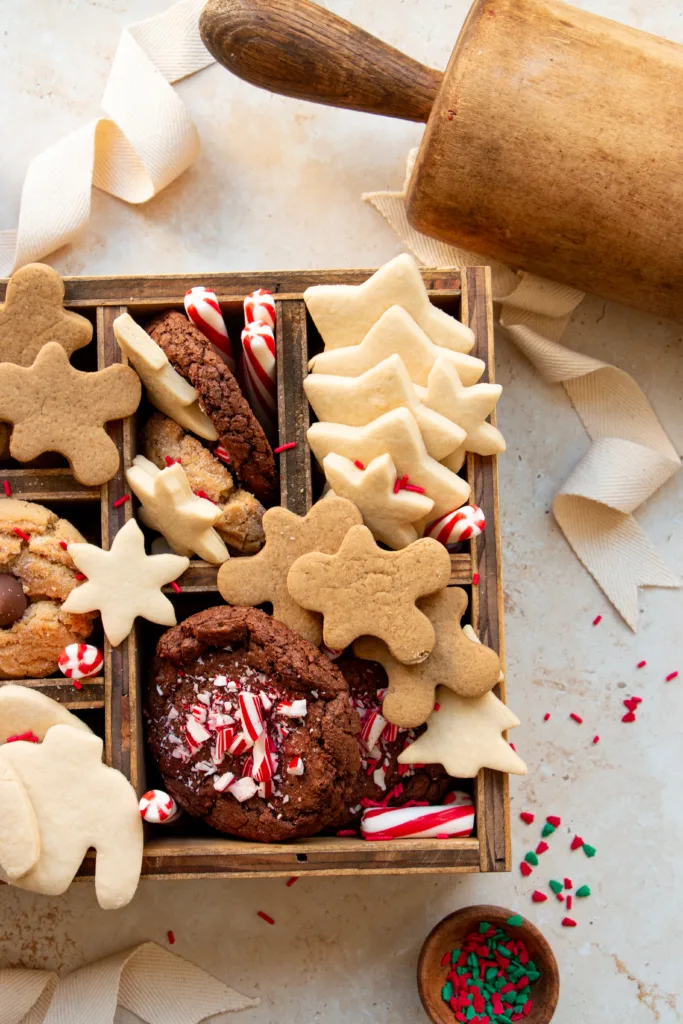
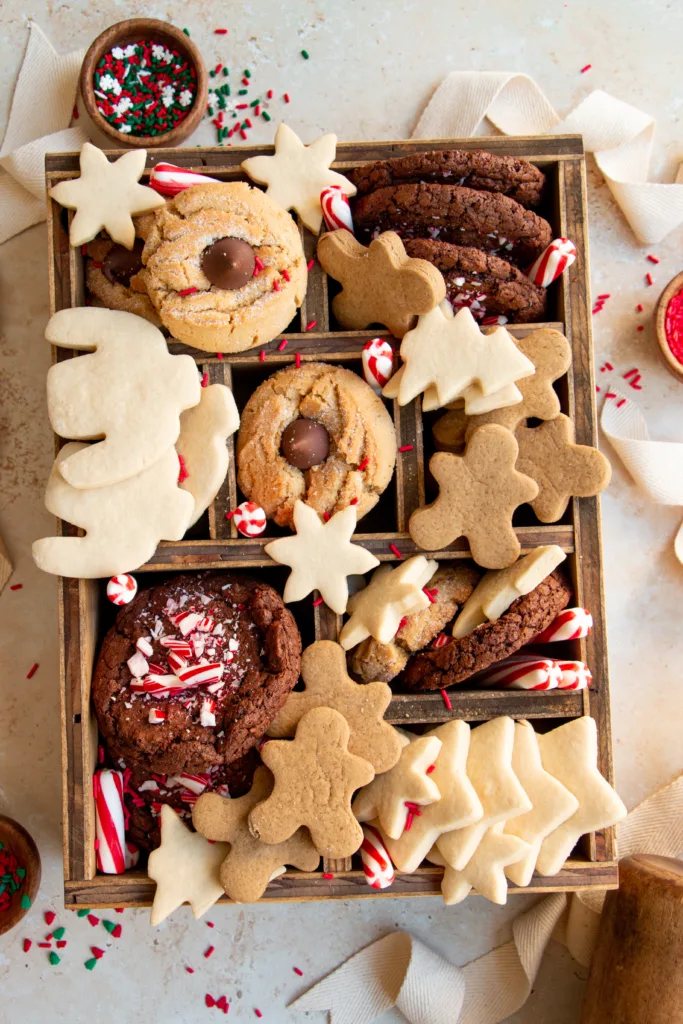
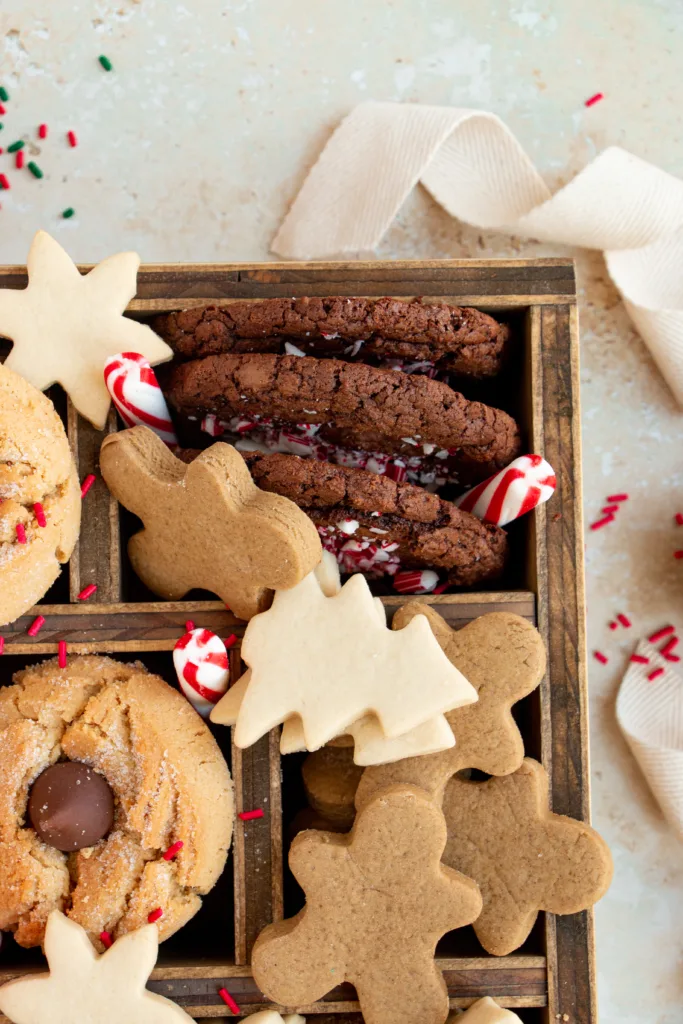
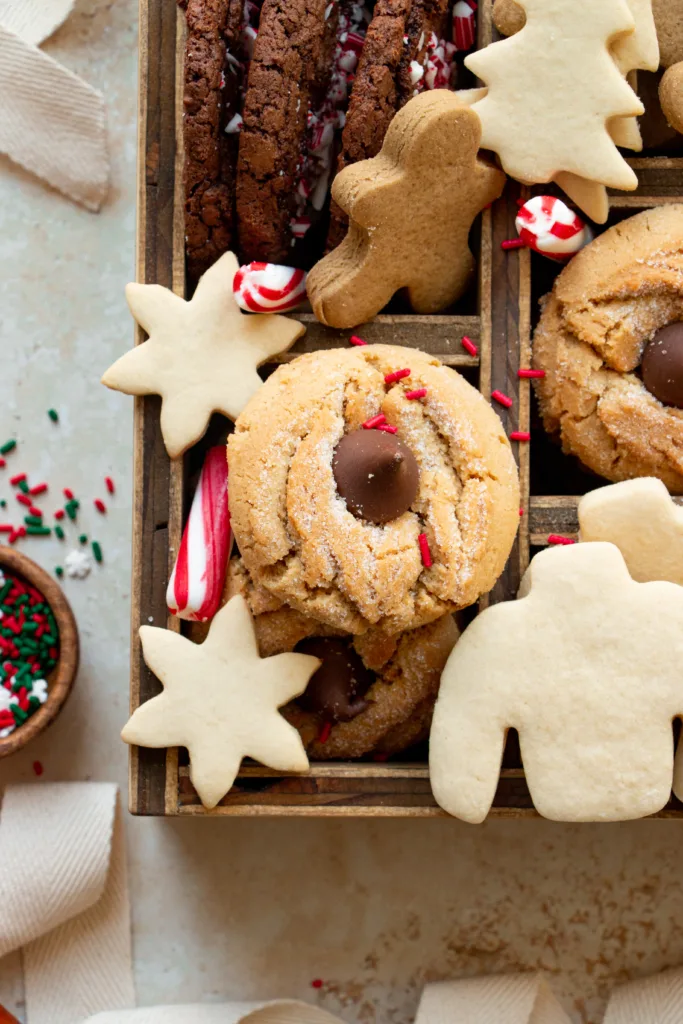
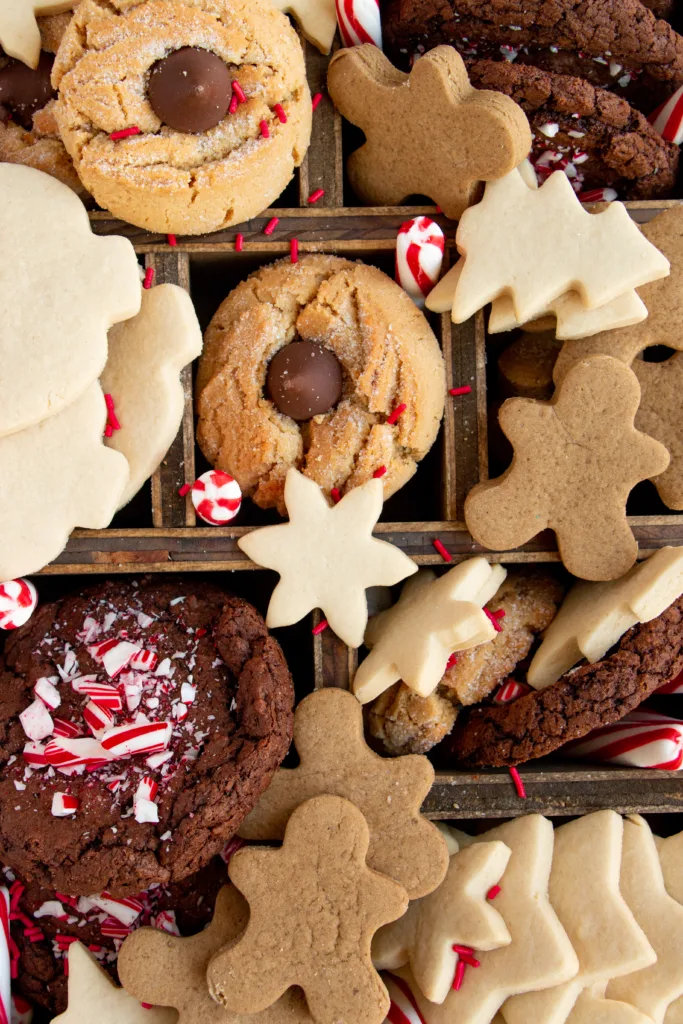
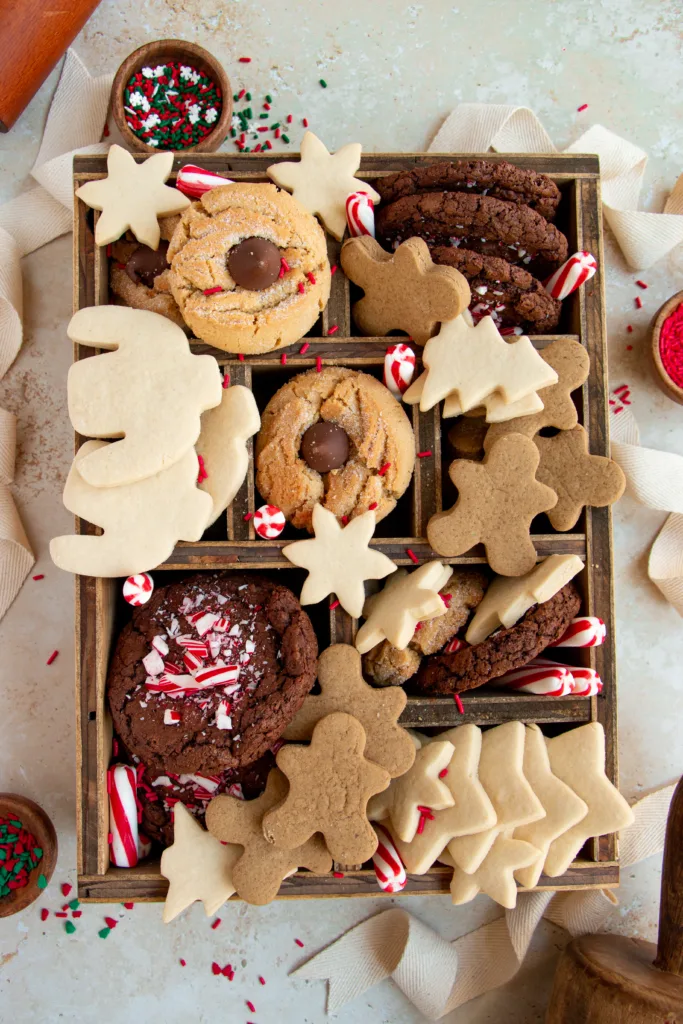
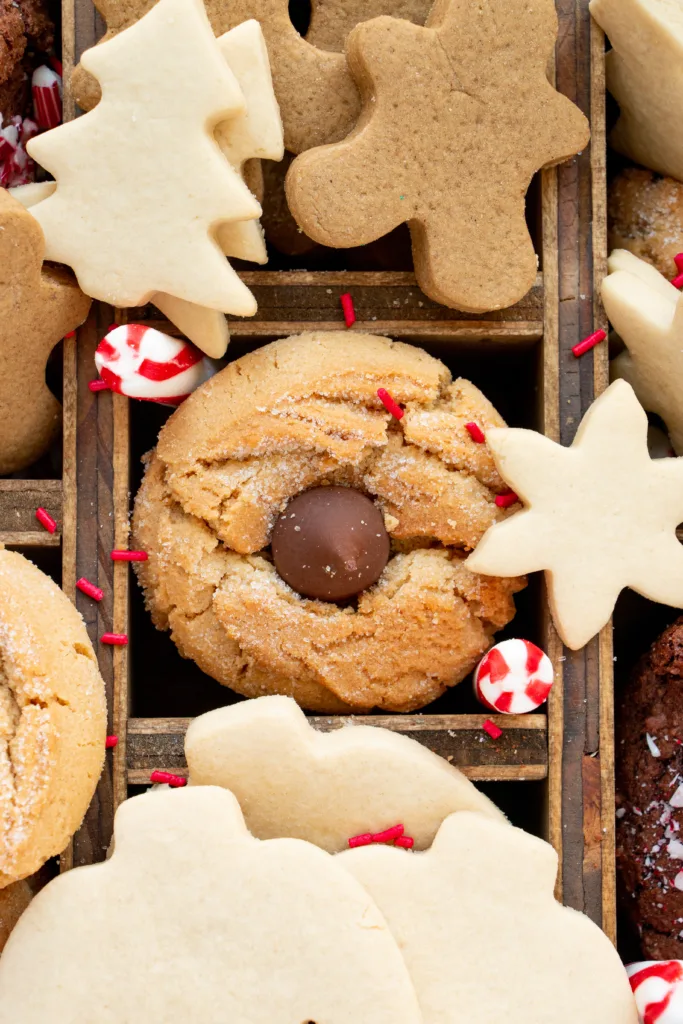
Possibly my favorite post of the year – this years holiday Christmas cookie box! My 2022 holiday cookie box is full of peanut butter, chocolate, peppermint, and plenty of sugar! Classics like peanut butter blossoms and gingerbread stack and package nicely, making them great for holiday tins or boxes. Fudgy peppermint brownie cookies add a nice contrast of color and cut out cookies are a must for fun shapes and sizes!
Spruce up your holiday box with ribbons, peppermints or candy canes, fun holiday sprinkles, bells, shredded paper, mini ornaments, and more!
Highlights of this years 2022 holiday cookie box:
- Fun contrast of colors and shapes
- Soft buttery sugar cookies
- Fudgy brownie cookies
- Pops of color from peppermints
- Decorated with fun ribbon and sprinkles
- Easy to package
- Hearty cookies that stack well
For more tips & tricks for your holiday cookie box, check out last years post on Creating a Holiday Cookie Box!
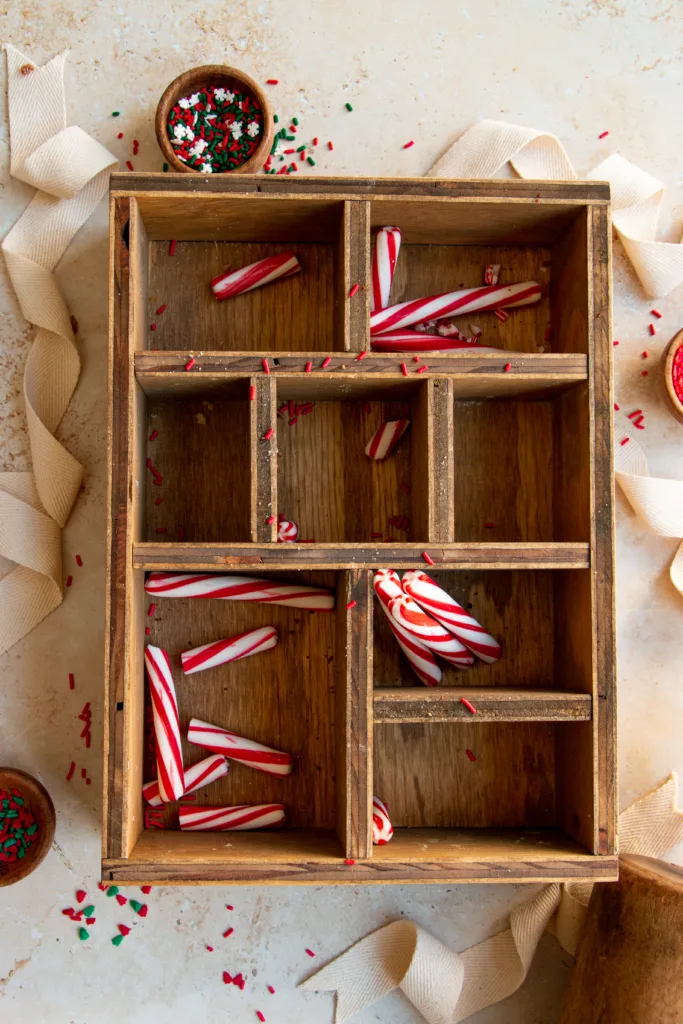
Start with an empty box and start arranging cookies, starting with the largest cookies until spaces start to fill up. Use small cookies and extras to fill in any empty space.
Keys tips for a hassle free holiday cookie box:
- Plan ahead!
- Pick hearty cookies that can stack
- Careful choosing chocolate covered items that may melt or stick to eachother
- Choose a variety of shapes and sizes, this helps fill in any empty spaces
- Try to pick between 5-8 options for a nice variety without creating too much work
- If choosing iced or frosted cookies, make sure the frosting sets up completely
- Add in extras like chocolates, peppermints, caramels, fudge, or marshmallows
- Find a good sturdy box, especially if shipping cookies
- Shredded paper adds a fun touch and gets cookies safe
- Stock up ahead of time on staples like flour, sugar, and butter
- Have a good collection of cookie sheets and cooling racks
Cookies I choose for this years box:
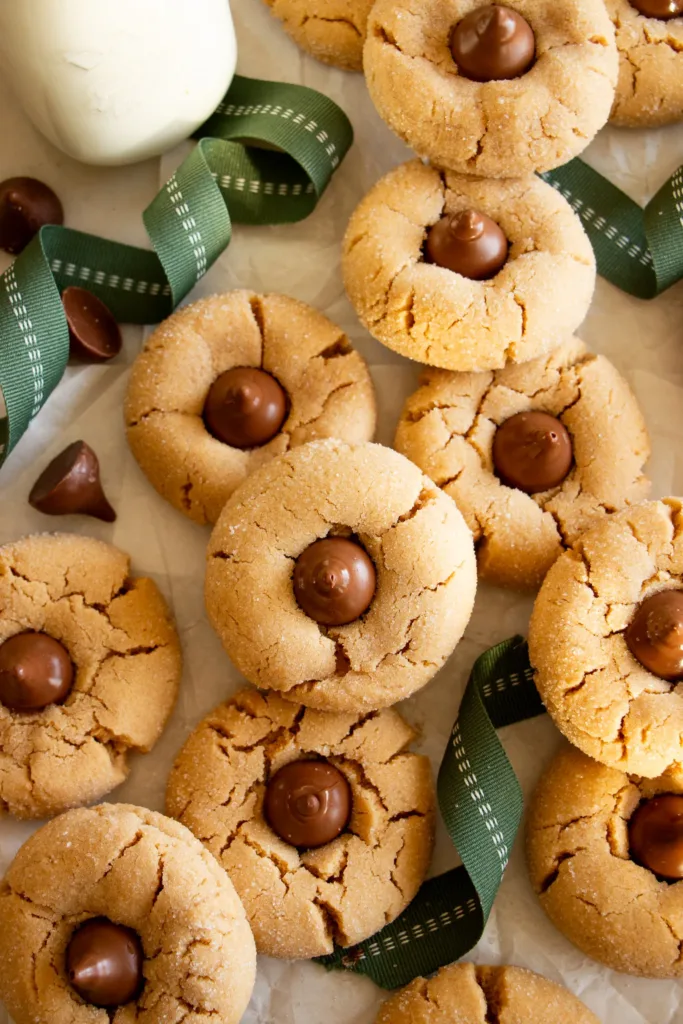
Easy Peanut Butter Blossom Cookies
Cut-Out Sugar Cookies

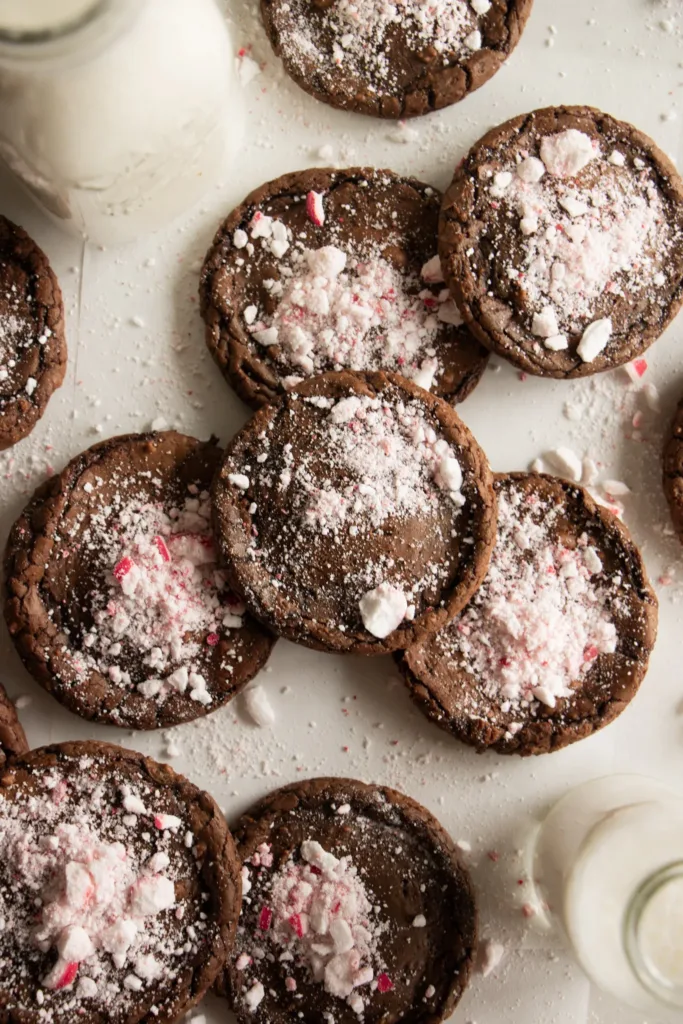
Fudgy One-Bowl Peppermint Brownie Cookies
Other treats that would be good!
- Salted Toffee Chocolate Chip Cookies
- Funfetti Shortbread Sandwich Cookies (use holiday sprinkles!)
- Molasses Ginger Cookies
- Cranberry Orange Shortbread Cookies
- Chai Spice Snickerdoodles
- Shortbread Sandwich Cookies with Chocolate Ganache Filling
- Chewy Ginger Cookies
- Easy Chocolate Covered Pretzel Rods
1. Start with a sturdy container
Finding the correct box for your holiday goodies is the very first step. The type of box or boxes you are looking for depends on how you plan to share your holiday boxes! If you are making a cookie box to set up while you have guests over than a large wooden crate or tin would be perfect. I was lucky enough to have one custom made for me, you can order custom made boxes of off Etsy but they can be pricey. If you happen to know anyone that does wood work, this is a great project for scrap wood. Check estate sales, vintage shops, and thrift stores for fun, unique tins or crates.
If you plan to ship your boxes you will want sturdy boxes that have lids. I would recommend packaging cookies boxes inside another box with plenty of fill to keep the cookies safe. You can find brown kraft paper bakery boxes on amazon or other online shops. Your local FedEx or USPS will have boxes on hand. The dollar tree has a good selection of small boxes with lids which are perfect for mini boxes.
2. Plan cookies
Aside from finding a container, this is thee most important part. See my tips above on how to pick treats for a successful cookie box. Think hearty cookies that wont break, treats that won’t melt or stick together, different sized items to fill up space evenly.
When making a box containing an assortment of things, try to plan simple items. This makes the process much less stressful! Plan doughs you can make ahead, it help’s to get into a rhythm of making the cookie dough, baking, and making the next dough while the other cookies bake. If you have a dough that requires chill time, make that first and continue with other cookies while that dough chills.
It can help to plan cookies that have the same baking temperature so you don’t have to swatch back and fourth. If you have cookies with different baking temps, try to batch them. I often like to spend one day making all the dough, scooping it or cutting out shapes, storing them on cookie sheets overnight in the fridge and baking everything the next day. It helps me to separate the tasks, it also seems to help me when I lay out several cookie sheets and cooling racks so that everything is ready for me.
You can also utilize some store-bought additions like chocolates, wrapped caramels, or candy canes!
3. Find fun ribbon, packaging, and extras
Other than the cookies, the extras are the best part! I like to watch throughout the year for fun ribbons, like Christmas colored ribbons, vintage velvet ribbons, fun twine, or wooden spools. Vintage ornaments or mini ornaments add fun pops of color.
Colored shredded paper works as a great filler and adds extra texture. You can also add texture with muffin liners or tissue paper. Bells add a fun touch and shine. Store-bought extras like chocolates or wrapped caramels, mints, or meringues can help fill in any empty spaces.
4. Timing: When to make your treats
Choosing when to bake your goodies can be tricky, you want to bake and ship as closely together as possible. Decide when your cookies need to arrive or when they will be consumed and back track from there. If shipping, allow 2-3 days for shipping (depending on the shipping method, you will most likely want overnight or 2 Day). Take into account shipping delays, FedEx is usually the best options, I would avoid the post office.
Once you know when you need to have your cookies ready to ship plan to bake your cookies 1-2 days before. In order to make this a little easier, make some of the cookies ahead of time, scoop, and freeze. That way you just have to thaw and bake. It eliminates some of the stress from making and baking all of the cookies in one day.
You’ll want to have your packaging picked out ahead of time as well as any extras. Also allow ample time to for your treats to cool before packaging. I try to let my cookies cool overnight before packaging them together.