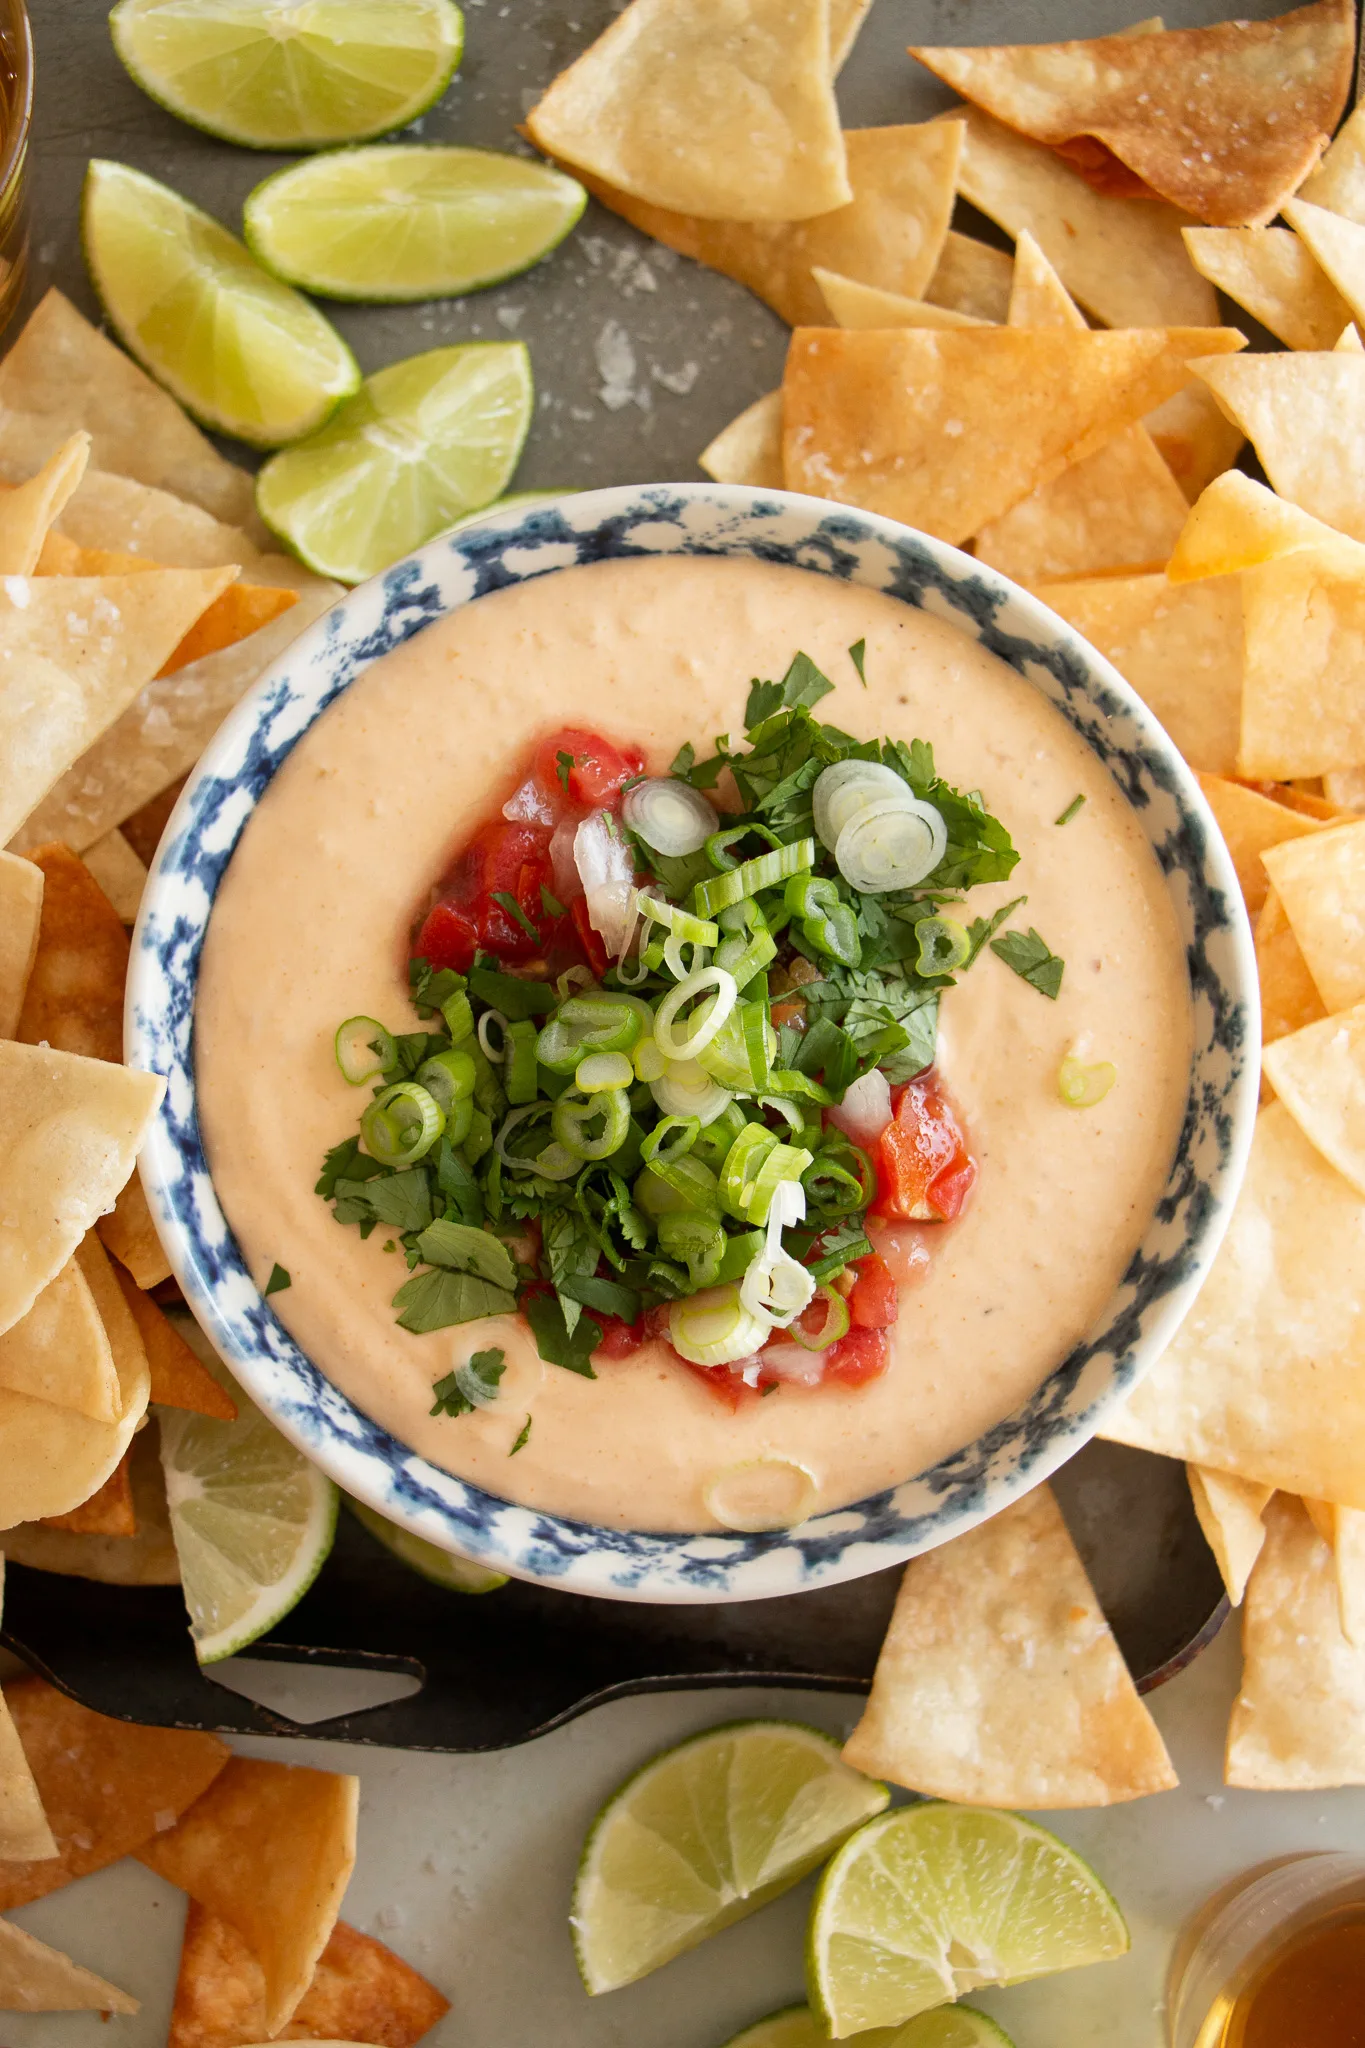
Need a quick appetizer that will impress any crowd? This Cheesy Baked Green Chile Dip is made with just 4 ingredients and sure to be a favorite! Mayo, cream cheese, canned diced green chiles, and shredded cheese are combined and baked until golden brown and bubbly! With the perfect bit of texture and slight heat this dip is a must. Serve with your favorite tortilla chips or sliced bread.

A Quick Look At The Recipe
Recipe: Cheesy Baked Green Chile Dip (4 Ingredients)
Ready In: 30 minutes
Serves: 12 servings
Staple Ingredients: mayo (avocado oil mayo will work!), cream cheese, shredded cheese, canned green chiles.
What Makes It Special: this cheesy dip is hard to resist! It comes together in minutes and bakes up perfectly cheesy and golden brown, it can even be kept warm in the slow cooker. Perfect for game days or potlucks, serve with your favorite tortilla chips or sliced bread for a yummy app!

If you’re a cheese dip fan, this will be your new favorite! Similar to queso, the mayo paired with the cream cheese make this super rich and creamy while the green chiles add a touch of heat and texture. My green chile queso or this slow cooker white queso are some other great options!
I like to keep mine simple and top with green onions, but cilantro, avocado, guacamole, or sour cream all pair well with this . You could even add in some shredded chicken before baking for a “buffalo chicken” type dip and pack in a little protein! My protein buffalo chicken dip is made with a cottage cheese base for higher protein, find all my easy dip recipes here for more inspiration.


Key Dip Ingredients
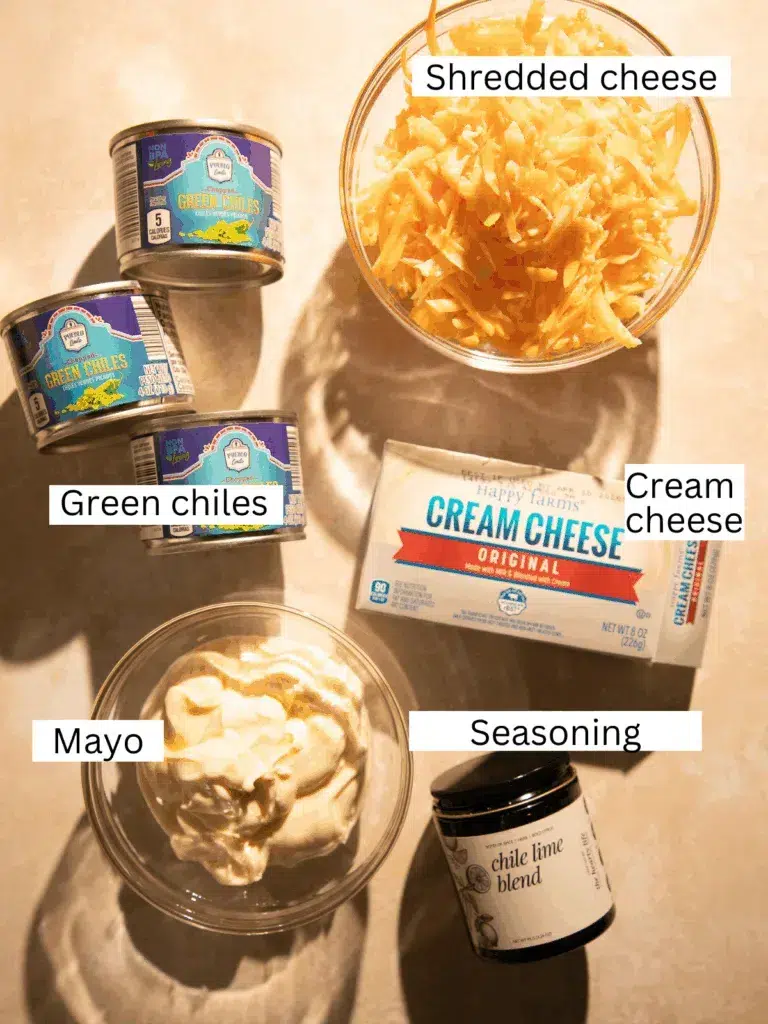
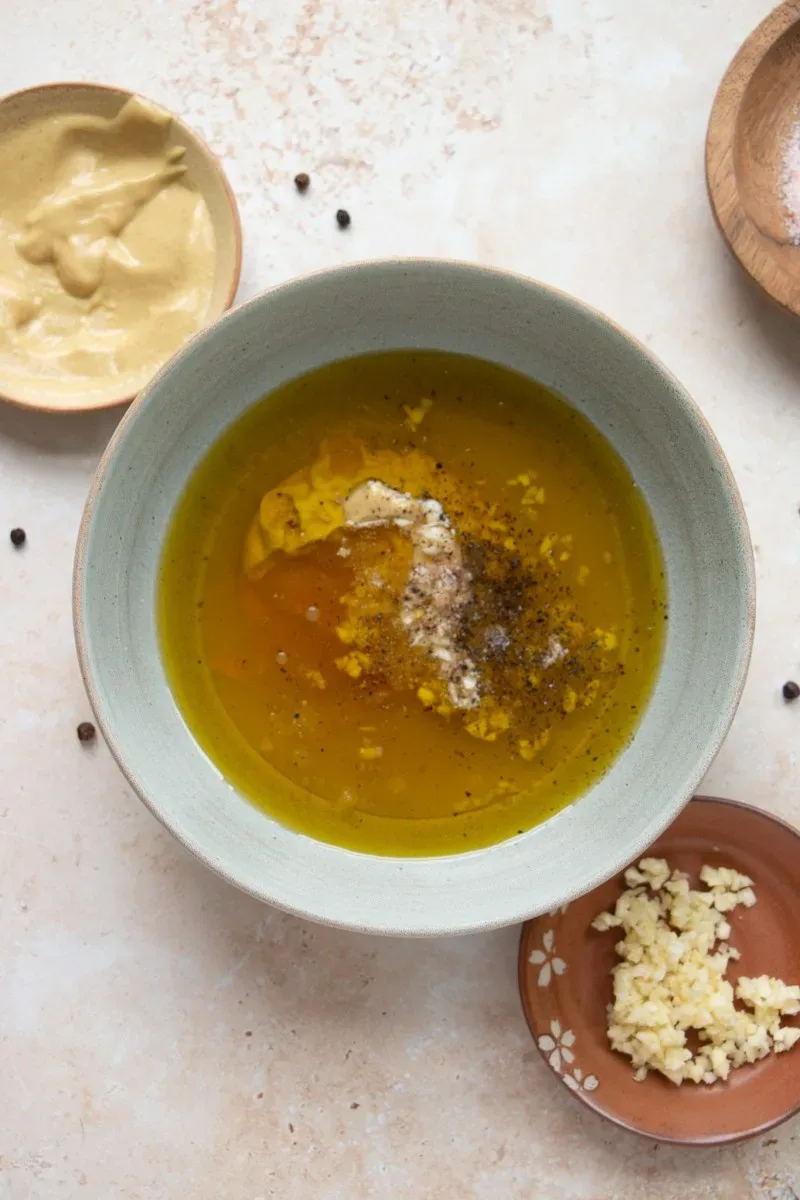
Cream Cheese: Softened for easy mixing and a smooth, creamy base.
Mayonnaise: Adds tang and creaminess; avocado oil mayo works just as well.
Diced Green Chiles: Mild, flavorful heat, canned is easiest, but roasted fresh chiles can be swapped in.
Colby Jack Cheese: Melts beautifully and keeps the dip gooey; cheddar or Monterey Jack are great alternatives.
Chile Lime Seasoning Blend: Optional, but adds a bright, zesty kick.
How to Make the Green Chile Dip
Let’s talk a little about how to make the Cheesy Baked Green Chile Dip (4 Ingredients) (The printable instructions are in the recipe card below.)
Quick overview:
- Combine dip, transfer to baking dish, bake until bubbly. Enjoy!
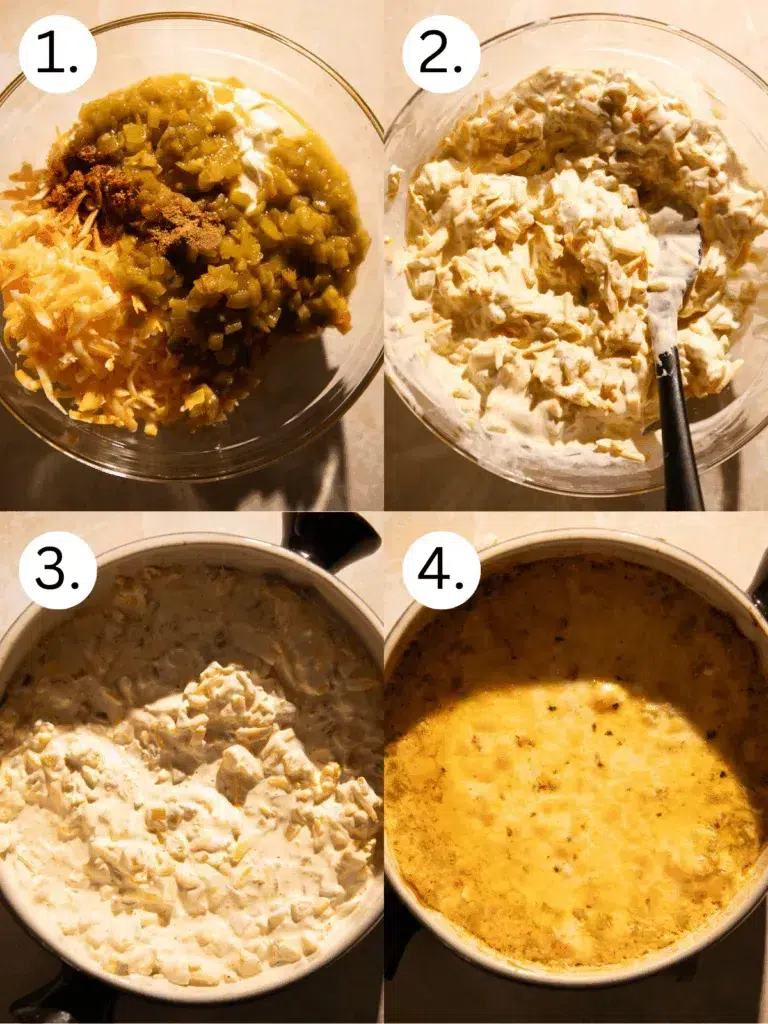
- Preheat oven to 350 degrees F.
- In a mixing bowl, combine cream cheese, mayo, diced chiles, seasonings, and cheese. Stir to combine. Transfer to the prepared baking dish. Bake at 350 for 20-25 minutes until warm and bubbly. If desired, broil on high for a few minutes to get the cheese nice and golden brown.
- Garnish with green onions and serve warm with your favorite tortilla chips or bread.
Serving Ideas & Variations
- Serve in a large baking dish, finished with your favorite garnishes, and set out with plenty of dippers (crostini, tortilla chips, thick-cut potato chips, veggie sticks).
- Keep it warm in a crockpot for an easy self-serve option at parties or on game day.
- Add some protein by mixing in shredded rotisserie chicken before baking! Similar to buffalo chicken dip.
- Add more heat by stirring in roasted jalapeños, poblanos, or Hatch chiles.
- Top with sour cream or Greek yogurt, crumble Queso fresco, avocado, or cilantro!

Creamy Baked Green Chile Cheese Dip
Equipment
Ingredients
- 8 oz. Cream cheese, softened
- 1 cup Mayonnaise
- 3, 4 oz. cans Diced green chiles
- 8 oz. Colby jack cheese , shredded
- 1 tsp Chile Lime Seasoning Blend, optional
- Sliced green onions , for garnish
- Tortilla chips or bread , for dipping
Instructions
- Preheat oven to 350 degrees F.
- In a mixing bowl, combine cream cheese, mayo, diced chiles, seasonings, and cheese. Stir to combine. Transfer to the prepared baking dish. Bake at 350 for 20-25 minutes until warm and bubbly. If desired, broil on high for a few minutes to get the cheese nice and golden brown.8 oz. Cream cheese, 1 cup Mayonnaise , 3, 4 oz. cans Diced green chiles , 8 oz. Colby jack cheese , 1 tsp Chile Lime Seasoning Blend
- Garnish with green onions and serve warm with your favorite tortilla chips or bread.Sliced green onions , Tortilla chips or bread
Notes
- Cheese: Colby jack, cheddar, pepper jack, or mozzarella are all great cheese options.
- Spice Level: Canned green chiles are mild, but you can swap in roasted Hatch chiles or add in jalapeño for extra heat.
- Make Ahead: Mix everything together, cover, and refrigerate up to 24 hours in advance. Just bake before serving. This dip can also be kept warm in a slow cooker!
- Serving Idea: Garnish with green onions, cilantro, or sliced avocado!
- Leftovers: Spread cold dip onto sandwiches (great in grilled cheese) or quesadillas the next day for an easy meal!
Nutrition
If you enjoyed this recipe, I would appreciate if you left a star rating on the recipe card above or a comment below sharing your experience! I value your feedback, it would also mean a lot if you could share this recipe or my website with friends or loved ones. Cheers!


Storage, Serving, & Reheating
Storage: Let the dip cool completely, then transfer leftovers to an airtight container. Store in the refrigerator for up to 3–4 days.
Serving: This dip is best enjoyed hot, straight from the oven. Garnish with green onions, cilantro, or a sprinkle of queso fresco before setting out with tortilla chips, pita chips, or veggies.
Reheating: Warm leftovers in a 350°F oven until heated through and melty, about 15–20 minutes. For smaller portions, microwave in 30-second intervals, stirring between bursts until hot.

Frequently Asked Questions
Yes! Mix everything together, cover, and refrigerate up to 24 hours before baking. Just pop it in the oven when you’re ready to serve.
Colby jack, cheddar, sharp cheddar, pepper jack, or mozzarella are the best options – I recommend shredding your own cheese!
Most canned green chiles are mild, but you can use medium or hot varieties if you like extra heat. Other peppers can be substituted as desired.
Bake as directed, then transfer to a small crockpot set on “warm”. Or begin in the crockpot and stir often until warm, keep on low.
Freezing isn’t recommended, the cream cheese base may turn grainy once thawed. It’s best enjoyed fresh or reheated from the fridge.
Tools I Recommend
- Glass Mixing Bowl – I love this lidded mixing bowl, it has measurement lines and the high sides are perfect for mixing without making a mess! Plus the lid is great for chilling in the fridge.
- Rectangular Baking Dish – the perfect size dish for this cheesy bake! I have a couple casserole dishes on hand in different sizes and shapes for a fun table spread. You never know when you will need more than one pan!
- Box Grater – I use this all the time to shred my own cheeses, shred veggies, or fruit. Shredding your own cheese makes all the difference!

Did you try this recipe?
Let me know what you thought by leaving a comment below and sharing your final dish on Instagram, Facebook, & Pinterest!
Cheers!
-Rachel